
hello! for those that don't know, i'm the frontend developer for daisybells central! just wanted to introduce myself a little because cassie does a lot of the talking for us and stuff. i've had so much fun learning front-end web dev and sharing my stuff on neocities :3
today, i decided to try and make an easy workflow for myself to apply postcss filters onto my css so my code works on all browsers and is mini-fied as much as possible. today, i just wanted to share my process on how i did it!
stage 1: learning node.js
i wanted to get a better understanding of how backend works so i followed a tutorial from Fireship about Node.js. i really had no idea what went into packing and shipping a webpage that wasn't just "create the html!" and then "upload it to a server!"
from his node.js tutorial, i finally learned like super basic theory revolving around how to use node package manager and terminal and everything and made a quick little webpage while following the tutorial!
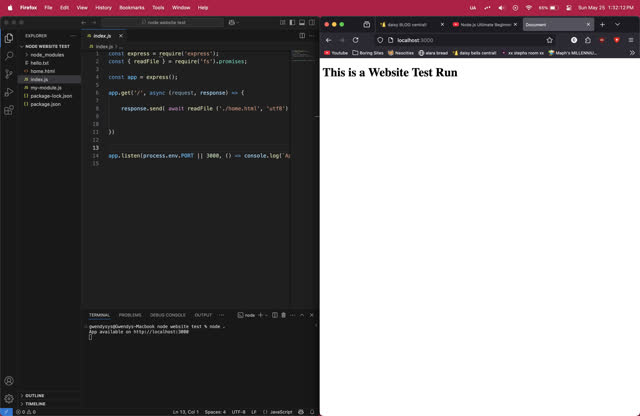
i got very unreasonably excited when this happened but still! it was really big to get all of those terminal responses in and getting an actual return with my webpage!
stage 2: vite and postcss
after learning all my npm and node commands, i moved onto actually using post-css. i wanted to learn it because i was worried any of my wacky crazy web elements wouldn't work on all browsers (safari is my enemy they blur my music page background).
anyways, i used this tutorial from Web Dev Simplified to create a postcss project. i wasnt planning on implementing auto-updates to my css in my main neocities project because the codebase for it is already so specific im not even sure how i'd implement it askdhjkasdh. maybe some other day.
here's the script that im using in my package.json file to run my postcss code. note that i set "build:css" equal to this:
find ./input-css -iname '*.css' |
    while read -r style; do
    postcss $style --base ./input-css --dir ./dest;
    done
this applies my postcss filters to all the files in ./input.css and then saves them in ./dest.css! the hardest part for me was figuring out how to maintain folder hierarchy, but i used my ffmpeg knowledge and lots of stackoverflow searches to put together this command!
this is already pretty useful on its own, cause all i need to do is open the folder in vscode and run the following in terminal:
npm run build:css
but that also means copying my stylesheets to .input-css, then opening vscode, then quitting my DBC project cause i have to switch out, so after a while, i decided i was tired of that.
stage 3: using bash to run it for me!
so my next step was to figure out how to basically turn it into an ffmpeg command, where i can just run a command in terminal when a folder is opened and it'll convert the files in that directory!
so first i had to make an executable bash script. luckily, i have experience with bash syntax thanks to ffmpeg, so that was simple. however, i did have trouble ensuring that the command ran 'npm run build:css' from the parent folder, rather than from my root directory.
i solved it thanks to this handy code from a thread on stack-overflow:
SCRIPT_DIR=$( cd -- "$( dirname -- "${BASH_SOURCE[0]}" )" &> /dev/null && pwd )i kept getting errors saying something like "packages.json could not be found in file path /Users/..." and this code just fixed that.
anyways, i added this to a .sh script, added 'npm run build:css', and yeehaw! we have a file that i can just double click and it converts my CSS without having to open VSCode!
#!/bin/bash

SCRIPT_DIR=$( cd -- "$( dirname -- "${BASH_SOURCE[0]}" )" &> /dev/null && pwd )
cd "$SCRIPT_DIR";

npm run build:css;

exit;
truly it ended up being so much more simple than i expected it to be. but, i thought i could take it one last step further.
stage 4: ffmpeg-ifying it!
i use ffmpeg ALOT. literally every image, gif, anything on this website has likely been processed through ffmpeg. i just find it so handy and convenient for making gifs from images or shrinking images to only the required sizes they're needed for. ffmpeg is the whole reason i learned bash at all!
anyways, you're likely wondering "what does 'ffmpeg-ify' mean?" well, since ffmpeg is something i can just run in terminal at whatever folder im in, i thought "what if i could make this shell script do that too!"
so off to the mines i went! searching for a way to make this work. i started off trying to think of it logically.
                    /* how do i make it so if i run the command 'buildcss' in terminal, it applies my postcss filters to the contents of my current folder? */
                    /* surely i can just run 'build-css.sh' in the folder im in! */
                    /* but then none of the dependencies are present in the folder! i need to be able to run the "build:css" script directly from my postcss project folder! */
                    /* what if you copied all the dependencies into the current folder and then deleted them? */
                    /* that seems like an ultimate waste of time, space, and computing power. */
                    /* ... but what if we did that in reverse?... */
(yes this is what our actual thought process was when trying to figure out a solution.)
so there was my solution!
- copy contents of current directory '
./' into '~/.../post-css/input-css/' - run '
~/.../post-css/build-css.sh' - copy contents of '
~/.../dest/' into './processed_css'
and here's how i implemented it, trying to prepare ahead for errors of any sort!
alias buildcss='
# check if there's a directory named /styleSheets
# this is just a safety measure i put in place for myself
if test -d ./styleSheets; then

    # clean post-css input and output folders
    rm -r ~/.../post-css/input-css/* ~/.../post-css/dest/* || true

    # copy contents of /stylesheets into /input-css
    cp -r ./style_sheets/* ~/.../post-css/input-css || { echo "Error: Failed to copy stylesheets to input-css." && return 1; }

    # run my build-css.sh script to process the files
    ~/.../post-css/build-css.sh || { echo "Error: build-css.sh failed." && return 1; }

    # copy processed files to an output directory /_processed_css
    cp -r ~/.../post-css/dest/* ./_processed_css || { echo "Error: Failed to copy processed CSS to dest." && return 1; }
  else
    echo "Error: ./styleSheets directory does not exist."
    return 1
  fi
'
and there's the code! i added that alias to my '.zshrc' file and now i can just open the folder in terminal, run 'buildcss', and then i have filtered css that's ready to be uploaded to neocities!! :D
part 5: conclusion
i hope that this was an interesting read. i know it's not the most complicated thing in the world if ur super tech savvy, but this is my first time ever doing something like this so it was all so new and exciting!!!
i hope that you learned a thing or two about making your own programs and, if not, i hope my explanation of my process was at least interesting! :)
have a lovely day <3
best,
-dee (she/her)